Dispatchers
The Dispatchers section configures automated actions triggered by monitoring events. When a metric condition or state transition occurs in the platform, a dispatcher determines what happens next — sending a notification, opening a ticket, calling an external API, or triggering an automation script.
Info
Dispatchers are the automation layer of XAUTOMATA. They connect monitoring events to real operational actions, enabling the platform to react automatically without manual intervention.
Where to Manage Dispatchers
Dispatchers can be managed in two ways:
- From the Tracking section — for a centralized view of all active dispatchers across the infrastructure.
- Directly from the hierarchy — by clicking the Dispatcher action button on any element in the Tree Hierarchy View (groups, objects, metric types, metrics, services).
Both paths open the same Active Dispatchers modal for the selected entity.
Opening the Dispatchers Section
From the main navigation menu, go to Tracking → Dispatchers.
The interface opens with a pre-filter dialog. Fill in one or more fields to narrow the search, then click APPLY.
Typical filter fields include:
| Filter field | Description |
|---|---|
| Name | Name of the dispatcher rule |
| Entity type | Type of entity the dispatcher is linked to |
| Status | Active or Disabled |
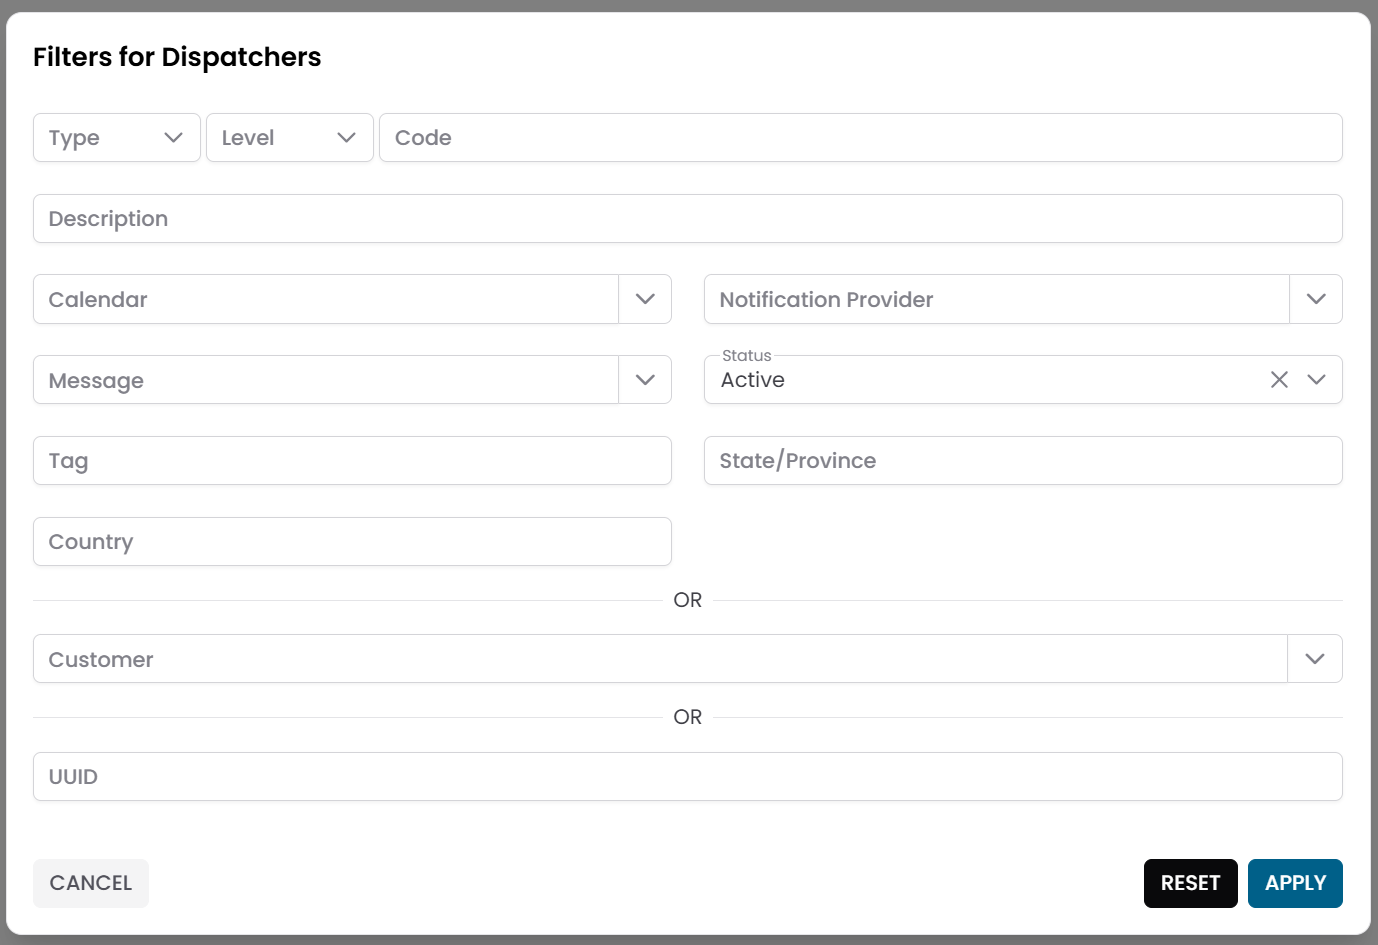
Fig.1 - Dispatchers pre-filter dialog
Dispatchers Table
After applying the filter, the results appear in a table where each row represents a dispatcher rule.
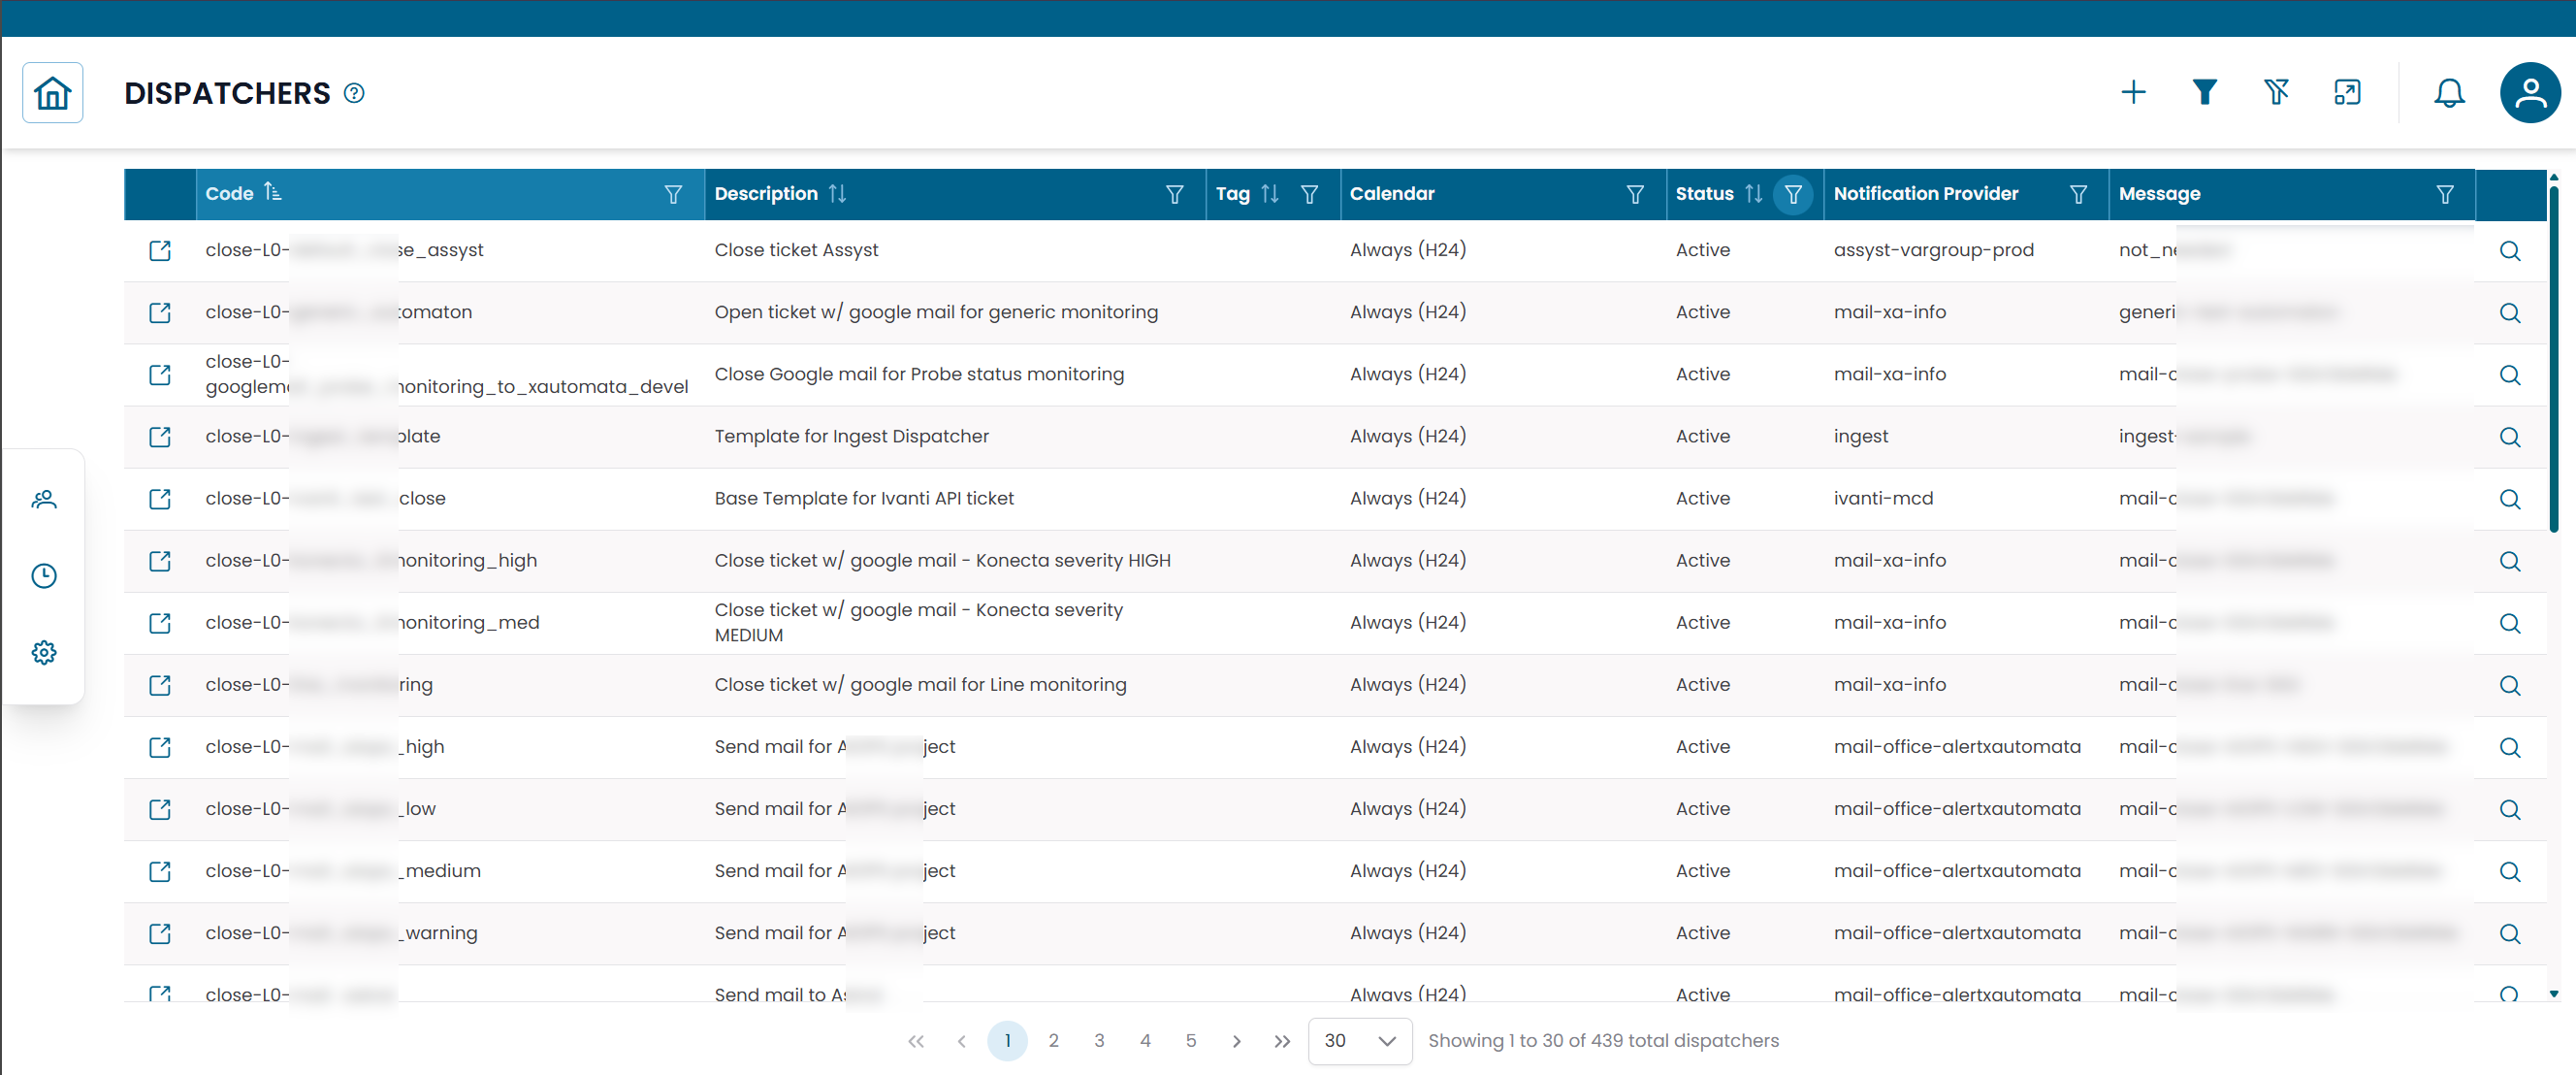
Fig.2 - Dispatchers results table
Creating a Dispatcher
The most common way to create a dispatcher is directly from the infrastructure hierarchy:
- Navigate to the entity you want to monitor — a group, object, metric type, metric, or service — using the Tree Hierarchy View.
- Click the Dispatcher action button on the target row.
- In the Active Dispatchers modal, click NEW.
- Fill in the dispatcher details (see fields below).
- Click SAVE CHANGES.
Dispatcher fields
| Field | Description |
|---|---|
| Name | Name of the dispatcher rule |
| Notification Provider | The channel used to deliver the action (email, webhook, ticketing system, etc.) |
| Message | The message template used to generate the notification content |
| Calendar | Optional calendar to restrict the dispatcher to specific time windows |
| Status | Active or Disabled |
| Notes | Optional notes |
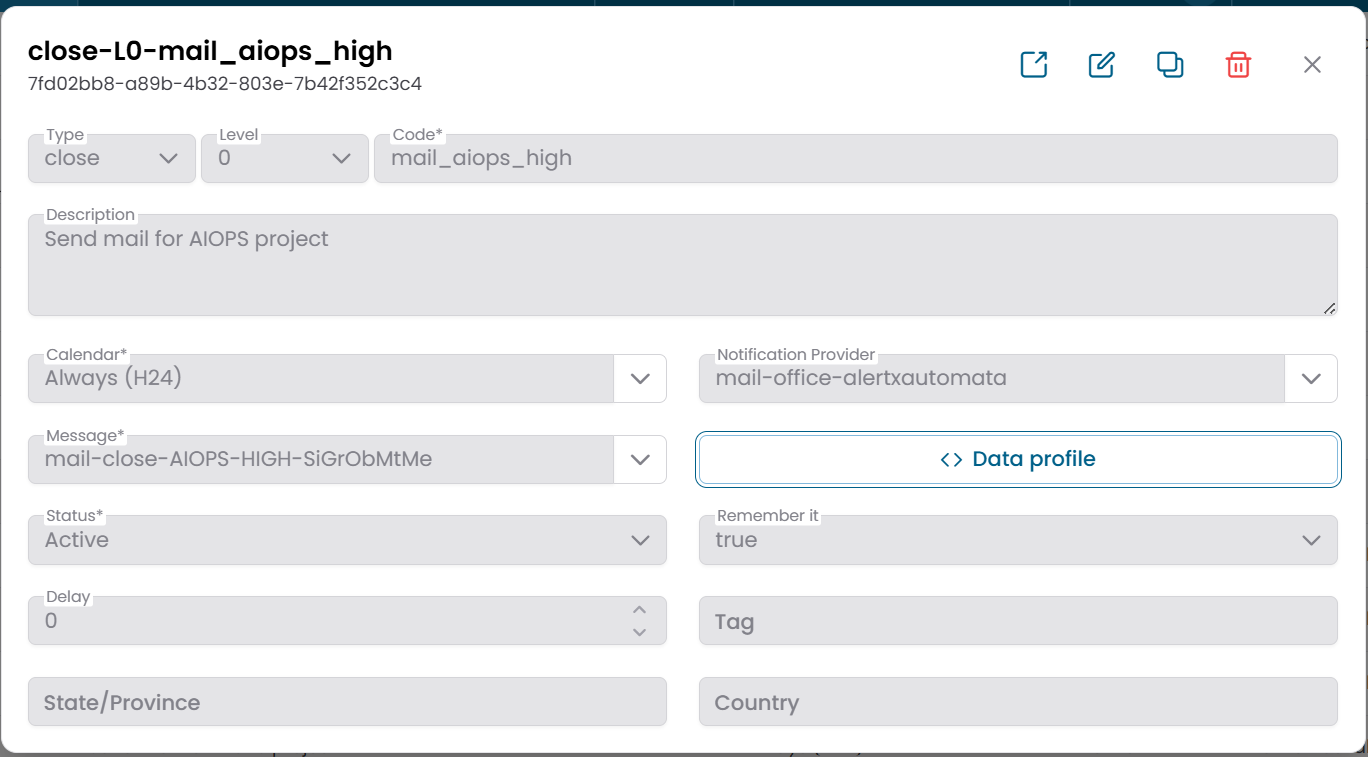
Fig.3 - Dispatcher edit dialog
Note
Notification Providers and Messages are configured in the Administration section. See Notification Providers and Messages for details.
How Dispatchers Work
When a monitoring condition is met, the platform evaluates the dispatcher rules associated with the affected entity.
If a matching dispatcher is active, it:
- generates a message using the configured Message template
- delivers it through the configured Notification Provider
- respects the Calendar schedule, if one is associated
This mechanism allows the platform to send different types of notifications — emails, tickets, webhooks — for different entities and conditions, all without manual intervention.
Typical Use Cases
| Scenario | Action |
|---|---|
| Server goes critical | Send email to the operations team |
| Service degraded | Open a ticket in the ITSM system |
| Network device unreachable | Trigger a webhook to an external automation tool |
| Metric threshold exceeded | Send a structured JSON payload to an API |
Mass Dispatcher
To apply a dispatcher rule to multiple entities at once, select them in any hierarchy or table view and use Massive Dispatcher.
This links the same dispatcher rule to all selected elements simultaneously.