Dashboard Management
This section covers how to create, configure, and manage dashboards. It is primarily intended for advanced users and administrators.
Entering edit mode
From any dashboard in view mode, click EDIT WIDGETS in the action bar.
The action bar changes to show the full set of editing controls:
| Button | Action |
|---|---|
| + ADD WIDGET | Open the Widgets Catalog to add a new widget |
| DASHBOARD SETTINGS | Edit dashboard metadata (name, description, refresh interval, etc.) |
| SAVE CHANGES | Persist all layout and widget changes |
| CANCEL | Exit edit mode discarding unsaved changes |
| DELETE DASHBOARD | Permanently delete this dashboard |
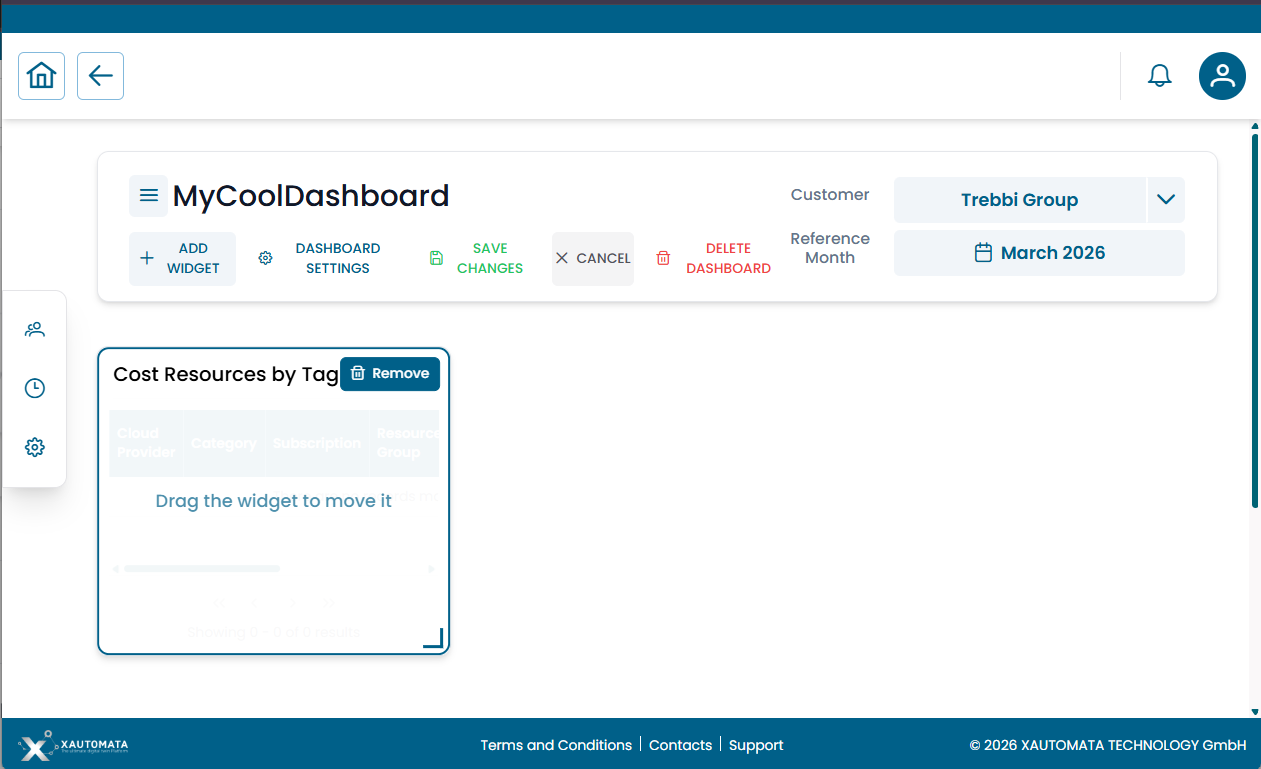
Fig.1 — Dashboard in edit mode — full editing action bar
Adding widgets
In edit mode, click + ADD WIDGET. The Widgets Catalog opens as a full-panel overlay.
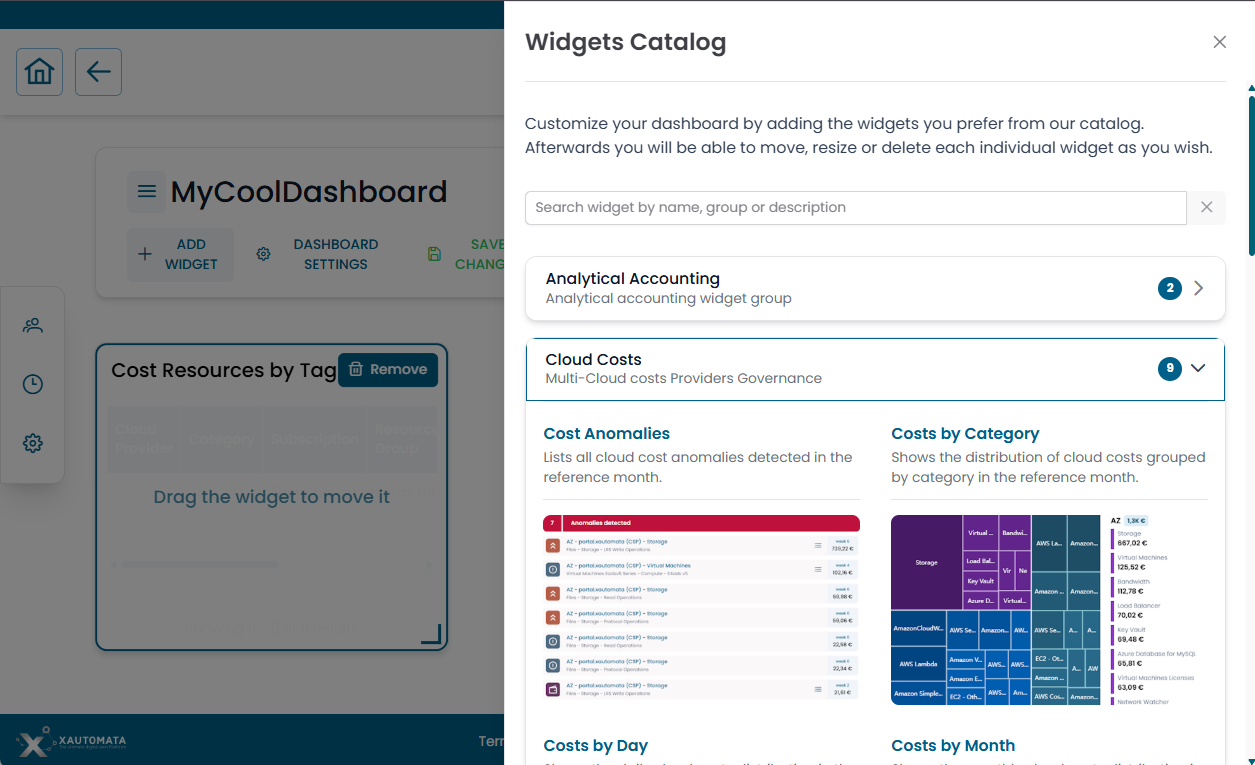
Fig.2 — Widgets Catalog — searchable, grouped by functional domain, with visual preview of each widget
The catalog provides:
- A search bar to filter by widget name, group, or description
- Widgets organized by functional group (e.g. Analytical Accounting, Cloud Costs, IT Infrastructure, Network…)
- A visual preview and short description for each widget
- A count badge on each group showing how many widgets it contains — click the group header to expand or collapse it
Click a widget to add it to the dashboard grid. The catalog closes and the widget appears on the grid with a "Drag the widget to move it" prompt.
Moving and resizing widgets
Once a widget is on the grid:
| Action | How |
|---|---|
| Move | Drag the widget by its title bar to any position on the grid |
| Resize | Drag the resize handle at the bottom-right corner of the widget |
| Remove | Click the Remove button that appears in the top-right corner of the widget in edit mode |
Saving changes
When you are done editing, click SAVE CHANGES in the action bar. A confirmation dialog appears:

Fig.3 — Save Changes confirmation dialog
Click Yes to persist all layout changes. Click No to return to editing without saving.
Configuring widget settings
After adding a widget, it may display:
⚙ Settings are required for this widget.
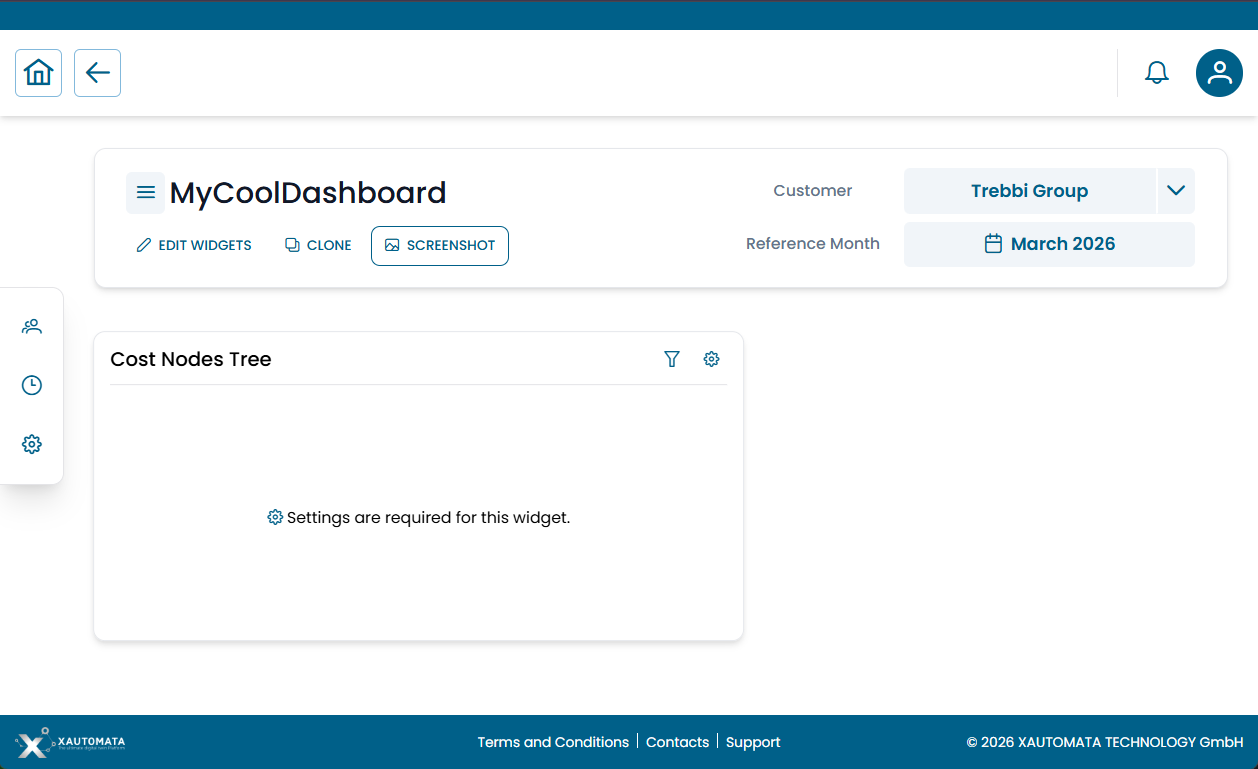
Fig.4 — Widget requiring configuration before it can display data
This means the widget needs specific parameters to know what data to show. To configure it:
- Click the ⚙ gear icon in the widget's top-right corner
- The Widget Settings dialog opens
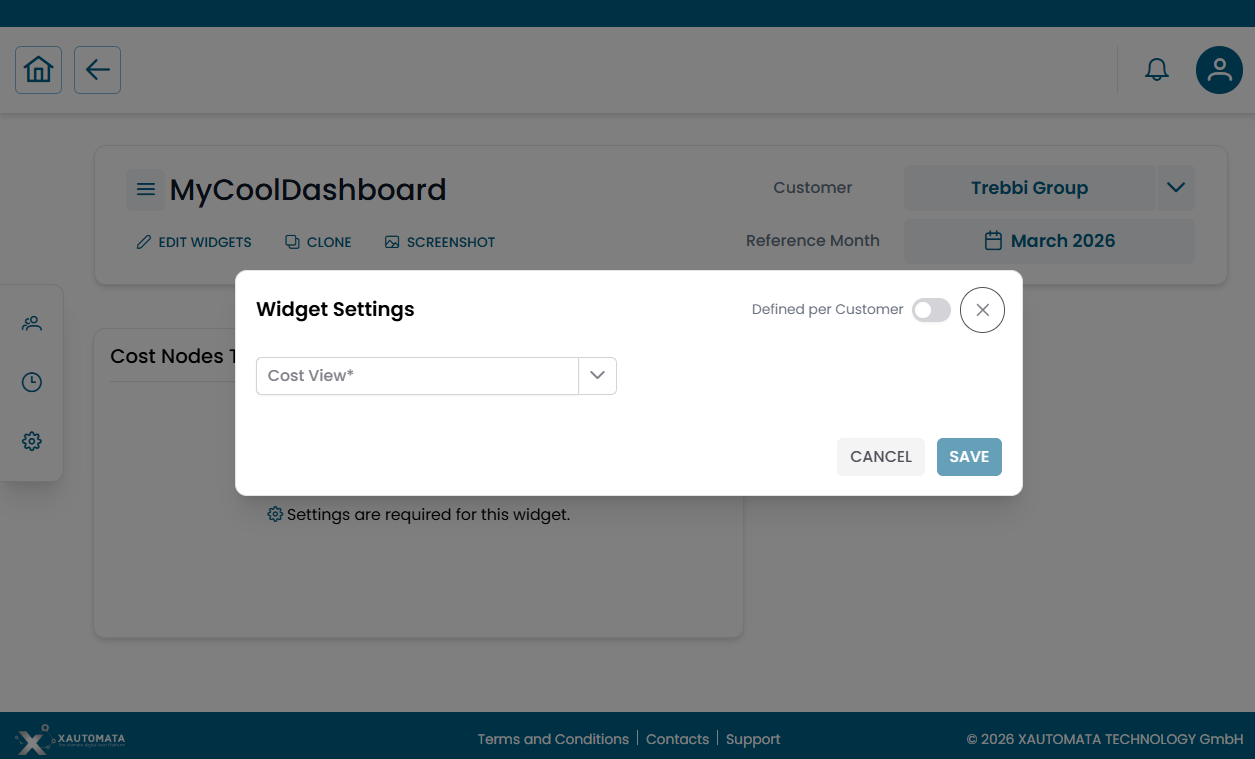
Fig.5 — Widget Settings dialog — select the required parameters and optionally enable "Defined per Customer"
- Fill in the required fields (e.g. a Cost View selector, a metric, a date range)
- Optionally toggle Defined per Customer (see below)
- Click SAVE
Defined per Customer
When this toggle is enabled:
- The dashboard layout stays the same for all customers
- Each customer can have different widget parameters (e.g. a different cost view or data source)
- Useful for global or shared dashboards reused across multiple customers
Info
This feature is particularly useful in multi-tenant environments where the same dashboard template is deployed for several customers, each needing to see their own data.
Cloning a dashboard
In view mode, click CLONE to create a personal copy of any dashboard — including global and shared ones.
The clone is added to your Personal Dashboards and can be freely edited without affecting the original.
Info
Cloning is the recommended approach when you want to customize a Global or Shared dashboard without impacting other users.
Creating a new personal dashboard
- On the dashboard home page, click the + button next to the Personal Dashboards section title
- Fill in: Name, Description (optional), Refresh interval
- Confirm — the new empty dashboard opens in edit mode, ready to receive widgets
Editing dashboard properties
In edit mode, click DASHBOARD SETTINGS to modify:
- Name and description
- Type (personal / global)
- Owner user
- Refresh interval
- Ordering priority in the list
- Thumbnail image
Deleting a dashboard
In edit mode, click DELETE DASHBOARD (shown in red in the action bar).
Warning
- You can only delete dashboards you own
- Deleting a dashboard removes it for all users who had access to it
- If you have access to a shared dashboard you do not own, the delete button is not available — you can only remove it from your personal list without affecting the original
Permissions reference
| Role | Capabilities |
|---|---|
| Standard user | Create / edit / delete personal dashboards; edit shared dashboards; clone any dashboard |
| Administrator | All of the above + manage global dashboards and other users' dashboards |
For permission configuration see Access Control.