Users
The Users section manages the accounts that can access the XAUTOMATA platform. Each user account defines authentication credentials, contact information, access permissions, and relationships with dashboards and infrastructure entities.
Opening the Users Section
From the main navigation menu, go to Administration → Users.
The interface opens with a pre-filter dialog. Fill in one or more fields to narrow the search, then click APPLY.
| Filter field | Description |
|---|---|
| User | Username identifier |
| User email address | |
| Phone | Contact phone number |
| Email Status | Verified or Not verified |
| Status | Active or Disabled |
| ACL Override | Optional override profile applied to the user |
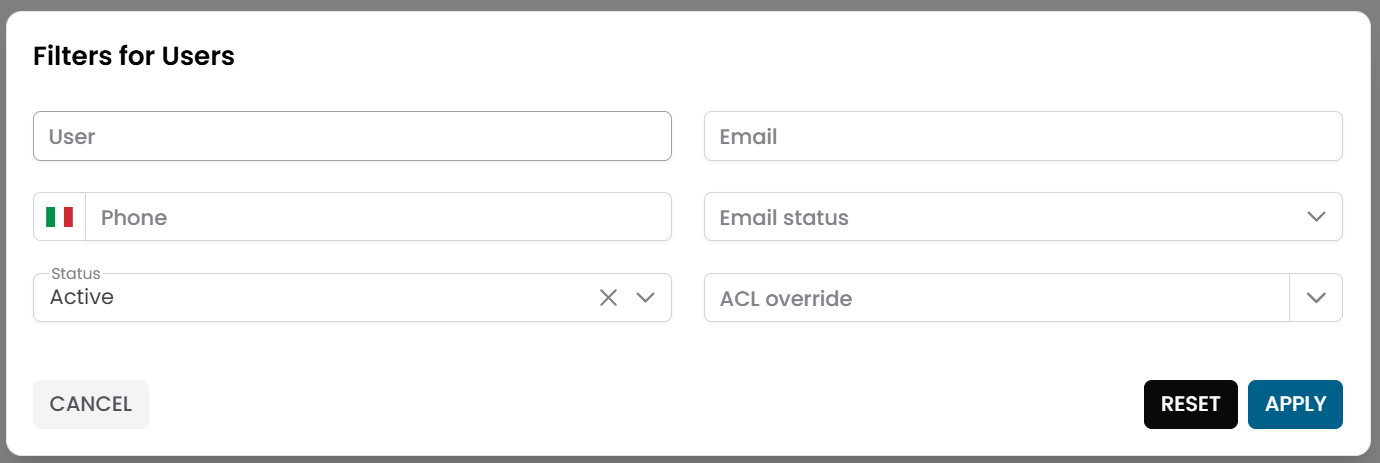
Fig.1 - Users pre-filter dialog
Users Table
After applying the filter, the results appear in a table where each row represents a user account.
Typical columns include:
- User
- Phone
- Status
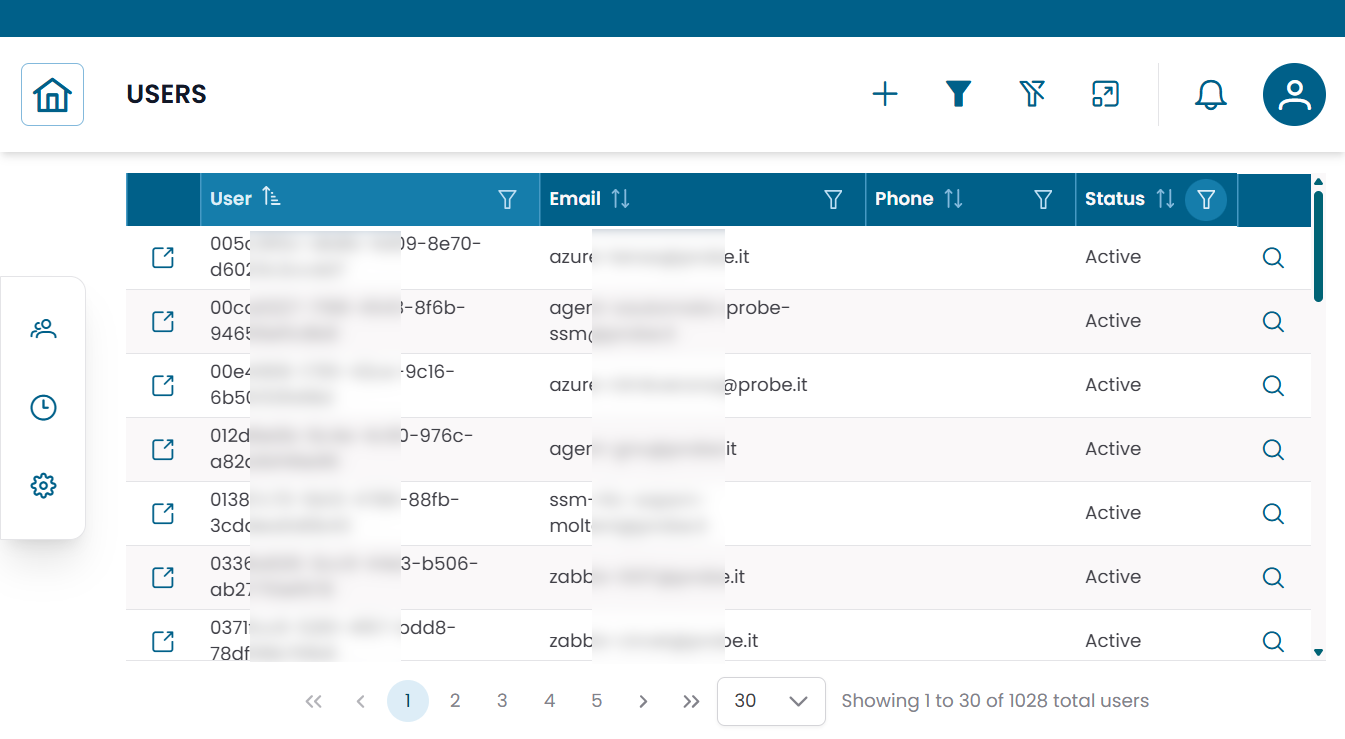
Fig.2 - Users results table
Creating a User
Click NEW to create a new user account. Fill in the fields in the dialog, then click SAVE CHANGES.
| Field | Description |
|---|---|
| User | Unique username for login |
| User email address | |
| Password | Initial password |
| Phone | Optional phone number |
| Email Status | Verified or Not verified |
| Status | Active or Disabled |
After creating the user, configure their ACL permissions (see below) and assign the relevant connections.
User Details
Click the search icon (🔍) on any row to open the user record.
From this dialog you can:
- update contact information
- enable or disable the account
- modify ACL permissions
- change the password by enabling the Edit password option
The dialog also shows Last change — the timestamp of the last password modification.
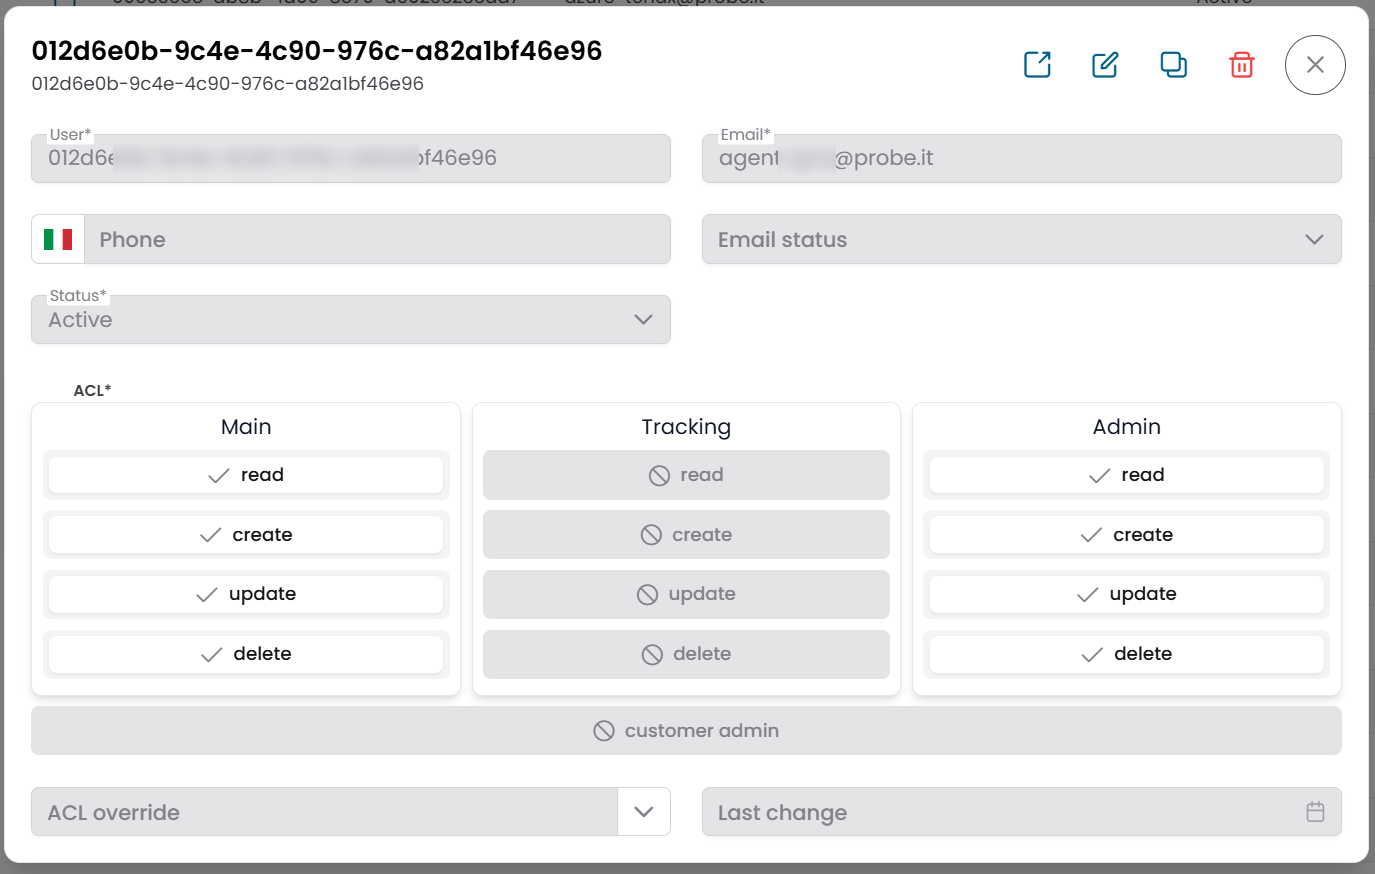
Fig.3 - User detail dialog
Access Control (ACL)
Each user is assigned an ACL configuration that determines which actions they can perform in the platform.
The ACL panel in the user dialog shows three columns — Main, Tracking, Admin — each with toggles for read, create, update, delete.
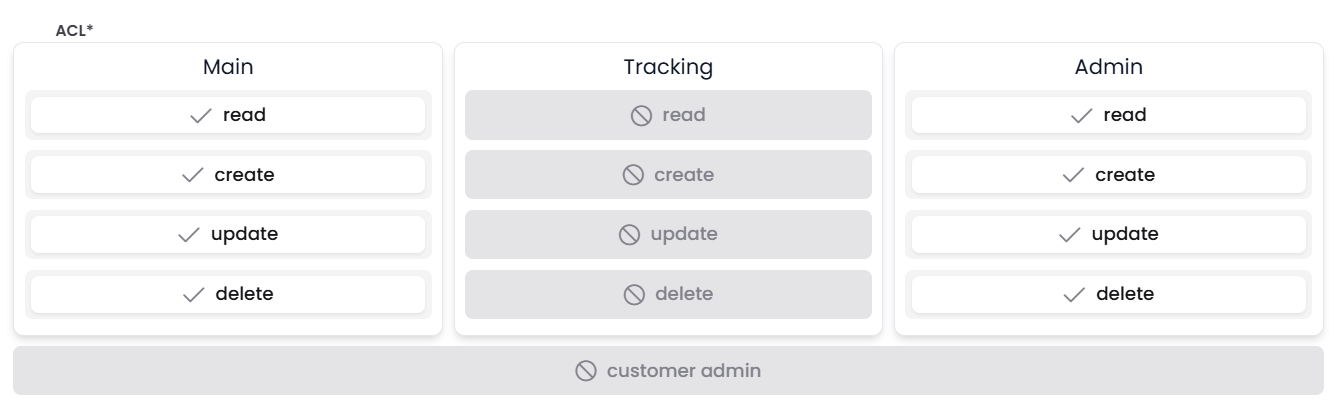
Fig.3b - ACL configuration panel — three domains with per-operation toggles
| Domain | Description |
|---|---|
| Main | Core platform entities and general operations |
| Tracking | Calendars, downtimes, and dispatchers |
| Admin | Administration section — users, probes, notification providers, and platform settings |
Within each domain, the following operations can be granted: read, create, update, delete.
Customer Admin flag
At the bottom of the ACL panel, the CUSTOMER ADMIN button sets a special flag that configures the user as a Tenant Admin — a customer-scoped administrator.
A Tenant Admin can access certain administrative functions (such as managing users) for the specific customers linked to their account, without having full platform administration access. They do not need Admin → Read to be enabled.
To configure a Tenant Admin, enable the Customer Admin flag and link the user to the relevant customers in the Connections View.
ACL Overrides
In addition to the base permissions, a user can be assigned an ACL Override profile. An override can restrict specific operations, hide form fields, or apply default values — without changing the user's base permission configuration.
ACL Overrides are managed in Super Admin → ACL Overrides. For a full description of the permission model and all user types, see Access Control.
Connections View
Click the link icon (🔗) on any row to open the Connections View for that user.
This view shows the entities linked to the user:
| Tab | Description |
|---|---|
| Dashboards | Dashboards this user can access |
| Groups | Infrastructure groups scoped to this user |
| Virtual Domains | Administrative domains this user belongs to |
| Customers | Customers this user has access to |
| Widget Groups | Widget groups available to this user |
Use this view to control what data and dashboards a user can see after login.
Warning
A user with no customer connections does not see an empty interface — instead they acquire Super User visibility and can see all customers in the platform. This behavior is automatic and not configurable via a toggle. Always link users to the appropriate customers unless you intentionally want them to have full cross-customer visibility.
Note
A user with no connections of any type (no dashboards, no groups, no customers) will see a largely empty interface. Always assign at minimum one dashboard and the relevant customers.
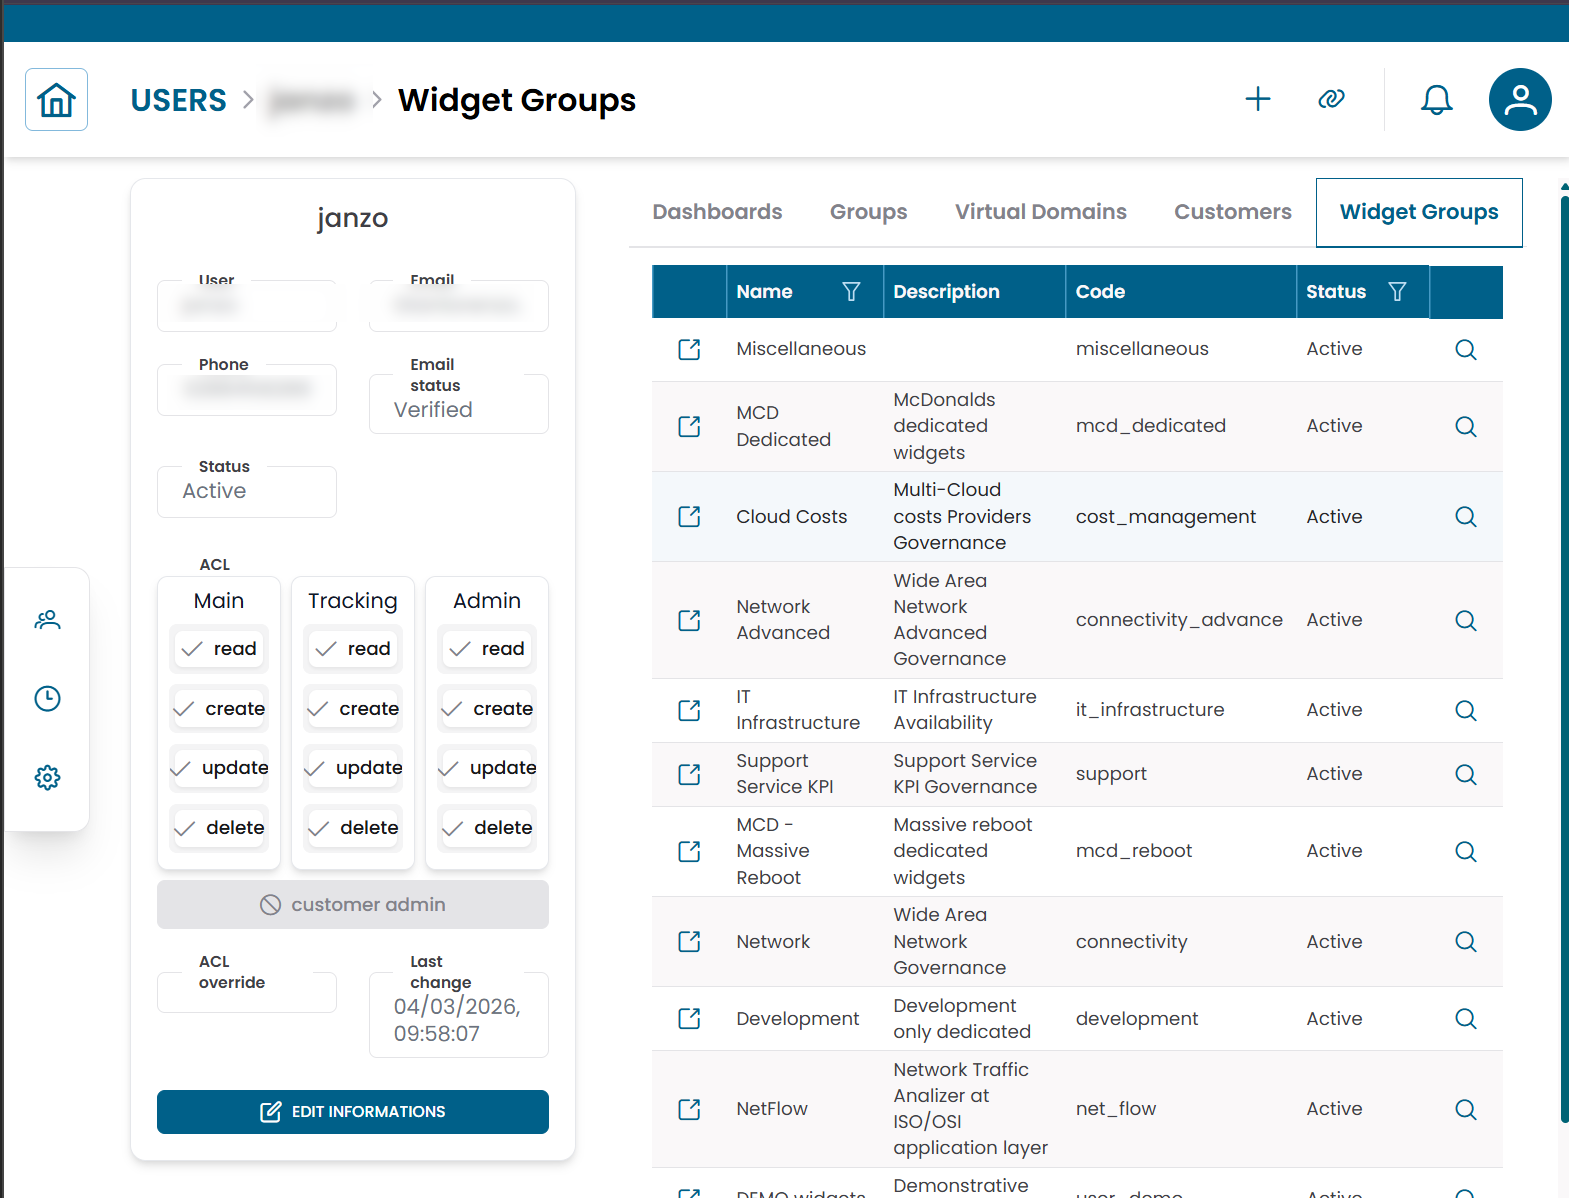
Fig.4 - User connections view
Note
For the full description of the permission model and ACL evaluation logic, see Access Control.