Working with Entities
Most sections of the Data Manager share a common interaction model. Understanding this model once lets you work with any entity — Users, Sites, Contacts, Groups, Objects, and others — in the same way.
Interaction flow
Each time you open an entity section from the navigation menu, you follow the same sequence:
- Pre-filter — narrow down the records to load
- Results table — browse and select records
- CRUD dialog — view, edit, copy, or delete a record
- Connections view — explore and manage relationships with other entities
Step 1 — Pre-filter
When you open an entity section, the platform displays a pre-filter dialog before loading any records.
Use this dialog to define search criteria and limit the result set. The available fields vary by entity type.
Three buttons are available:
| Button | Action |
|---|---|
| CANCEL | Close the dialog without loading records |
| RESET | Clear all filter fields |
| APPLY | Load the records matching the criteria |

Fig.1 — Pre-filter dialog (example: Users) — set criteria before loading records
Step 2 — Results table
Matching records are displayed in a table. Each row represents one entity record.
The table supports sorting, column filtering, and pagination.
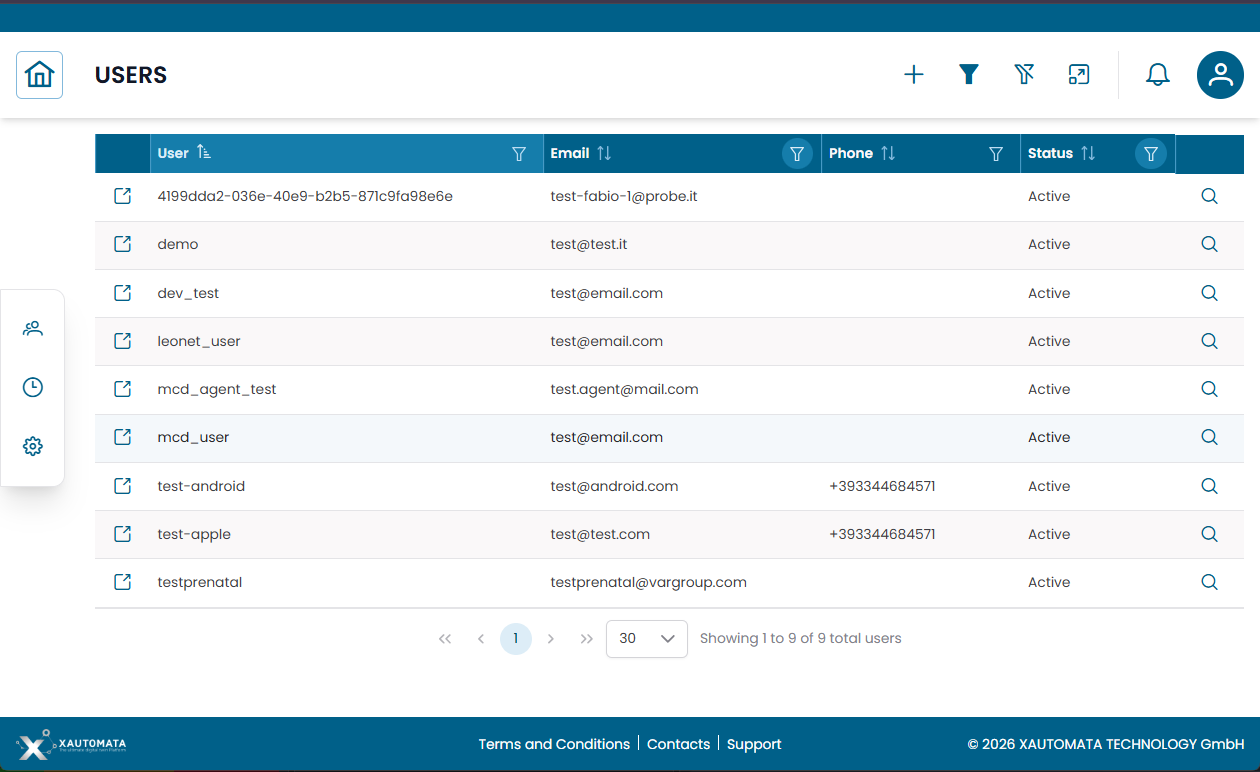
Fig.2 — Results table — each row has action icons on the left (link) and right (detail)
Each row exposes two action icons:
| Icon | Position | Action |
|---|---|---|
| Link icon | Left side of the row | Opens the Connections view for that record |
| Magnifier icon | Right side of the row | Opens the CRUD dialog for that record |
Step 3 — CRUD dialog
Click the magnifier icon on any row to open the CRUD dialog.
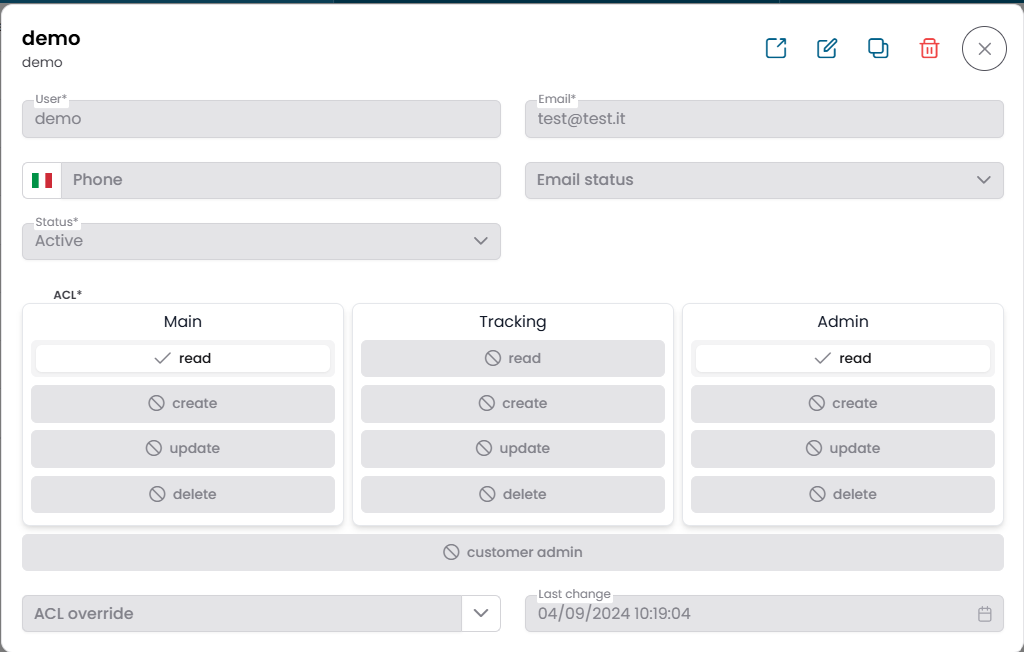
Fig.3 — CRUD dialog — detail view with action buttons in the toolbar
The toolbar at the top of the dialog contains icon buttons, left to right:
| Icon | Action |
|---|---|
| ↗ Link | Open the Connections view for this record |
| ✏️ Edit | Switch to edit mode and modify the record fields |
| ⧉ Copy | Duplicate the record as a new entry |
| 🗑 Delete | Permanently delete the record |
| ✕ Close | Close the dialog and return to the table |
Warning
Deletion is immediate and cannot be undone. Confirm the action only when you are sure.
Step 4 — Connections view
The Connections view lets you explore and manage the relationships of a record with other entities in the platform.
You can reach it in two ways:
- Click the link icon on the left side of a table row
- Click the ↗ Link icon in the CRUD dialog toolbar
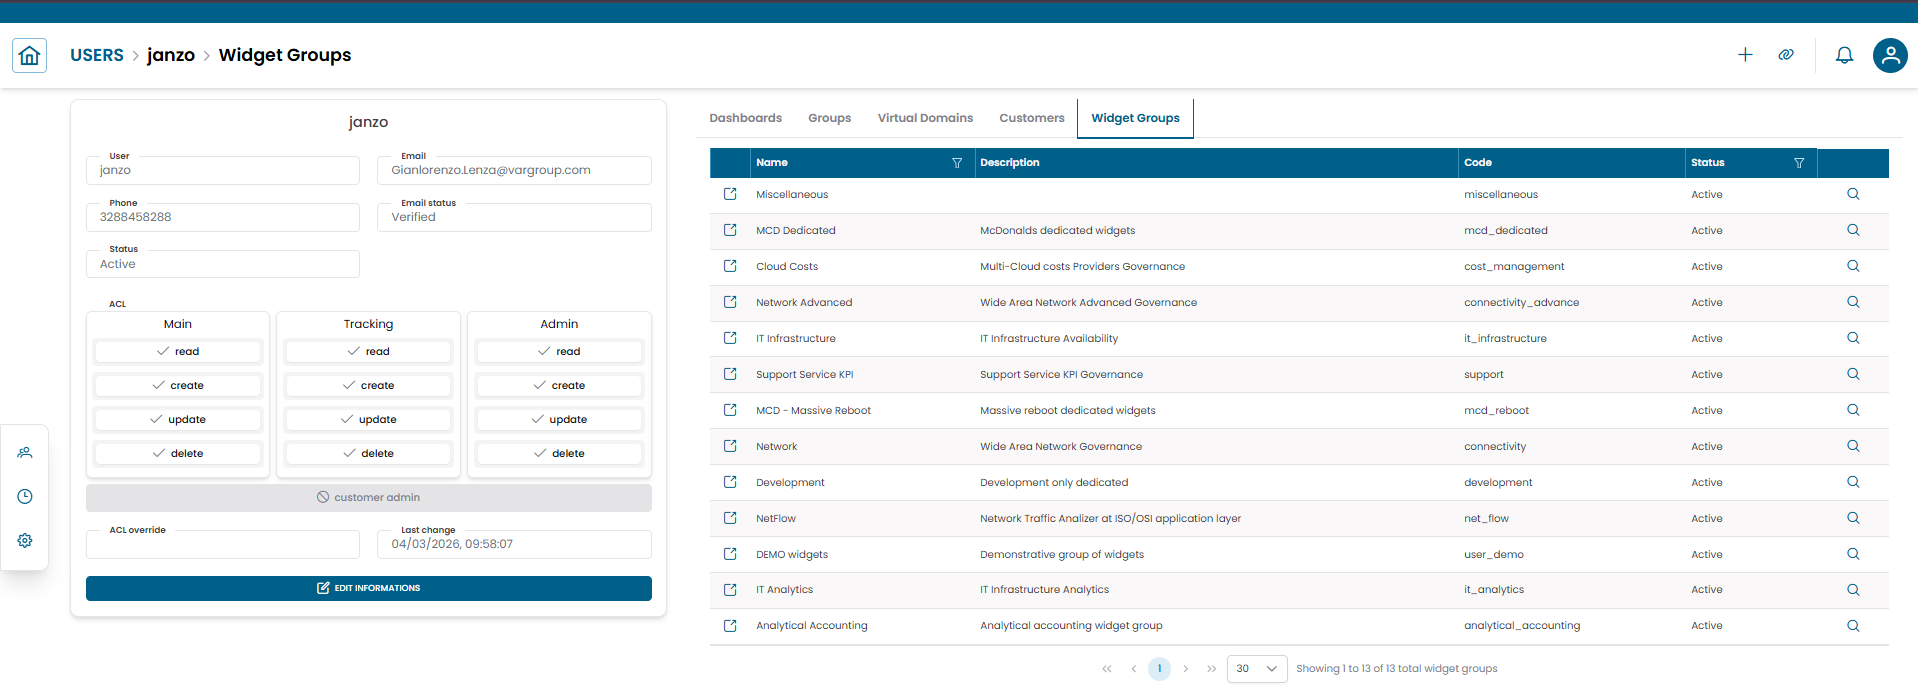
Fig.4 — Connections view — two-panel layout with record details on the left and relationship tabs on the right
The view is split into two panels:
Left panel — record summary
Displays the selected record in read-only mode. At the bottom of the panel, click EDIT INFORMATIONS to open the full CRUD dialog for that record.
Right panel — relationships
Shows the entity's relationships organised into tabs (e.g. Dashboards, Groups, Virtual Domains, Customers, Widget Groups). Select a tab to browse the related records of that type.
A breadcrumb at the top of the view shows your current position, for example: USERS > janzo > Dashboards.
The available tabs depend on the entity type.
Tree hierarchy view (Objects, Groups, Customers)
Some entities — Objects, Groups, and Customers — support an alternative Tree hierarchy view that shows the parent-child structure instead of a flat list.
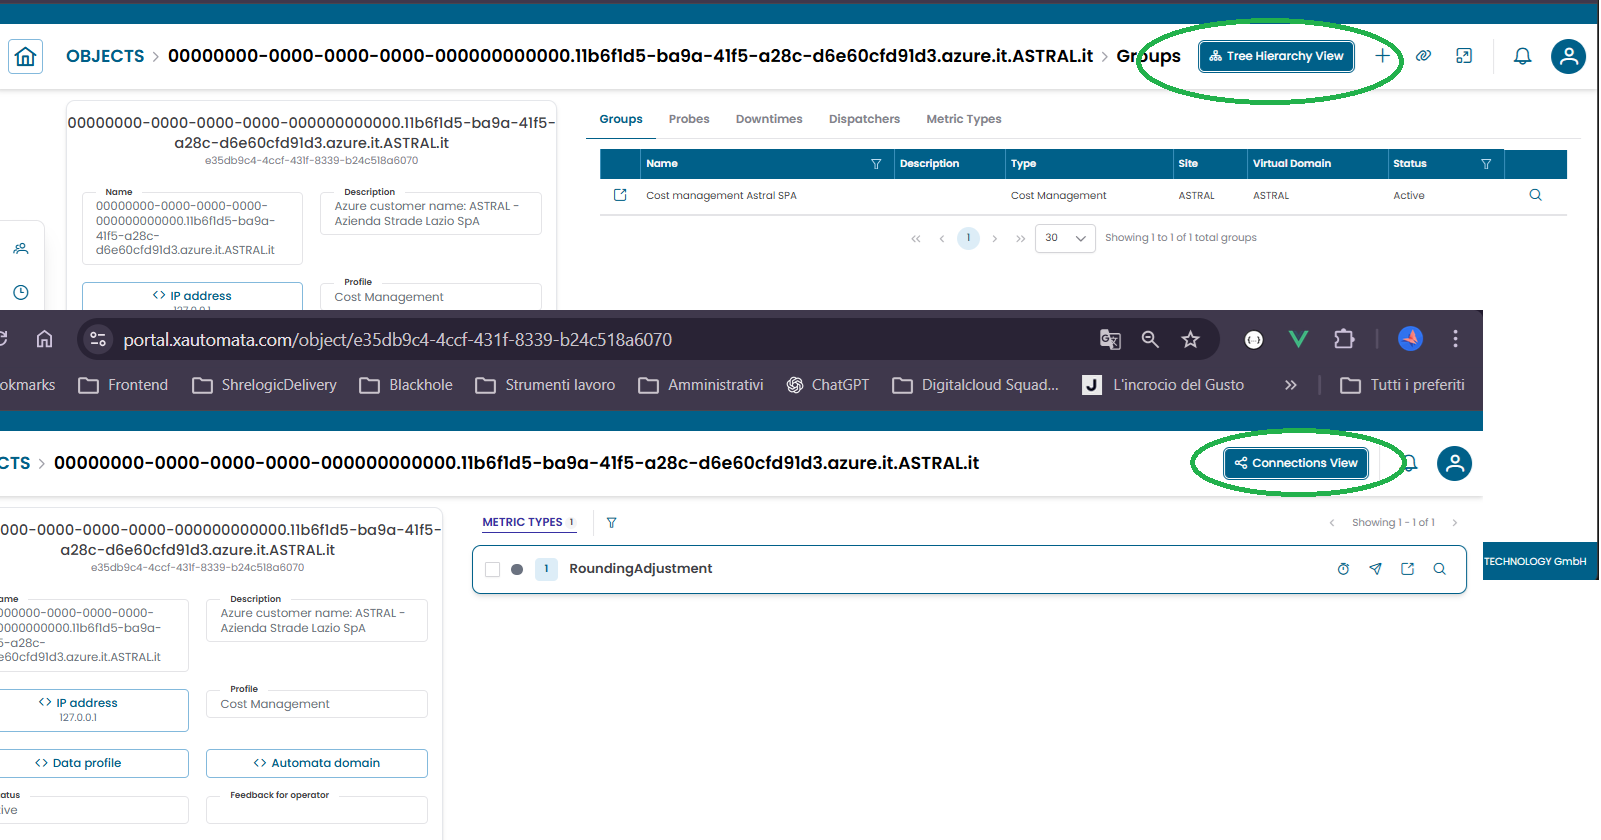
Fig.5 — Connections view with the Tree hierarchy switch visible (Objects, Groups, Customers)
How to access the tree view:
- For Objects: clicking the link icon on a table row lands directly on the Tree hierarchy view. The right panel shows the entity's related sections (e.g. Metric Types, Metrics) rather than tabs. The left panel may expose additional action buttons such as EDIT INFORMATIONS and DOWNTIMES. Use the Connections View button in the top-right area to switch back to the standard Connections view.
- For Groups and Customers: the Connections view displays a toggle switch in the top bar that lets you alternate between the flat Connections view and the Tree hierarchy view.
For a detailed explanation of the tree structure and how to navigate it, see Tree Hierarchy View.