Cost Views
The Cost Views section lets you build custom structures to organize cloud costs according to your organization's internal model — by environment, department, project, or any other grouping that reflects your accounting needs.
Cost Views are the bridge between raw provider billing data and the Analytical Accounting widgets, which display costs organized according to the structure you define here.
Opening the section
From the main navigation menu, go to Administration → Analytical Accounting → Cost Views.
The interface opens directly in a table — no pre-filter. Each row represents one Cost View.
| Column | Description |
|---|---|
| Name | Name of the Cost View |
| Description | Optional description |
| Customer | Customer the Cost View belongs to |
| Type | Nodes Tree or Azure Tags |
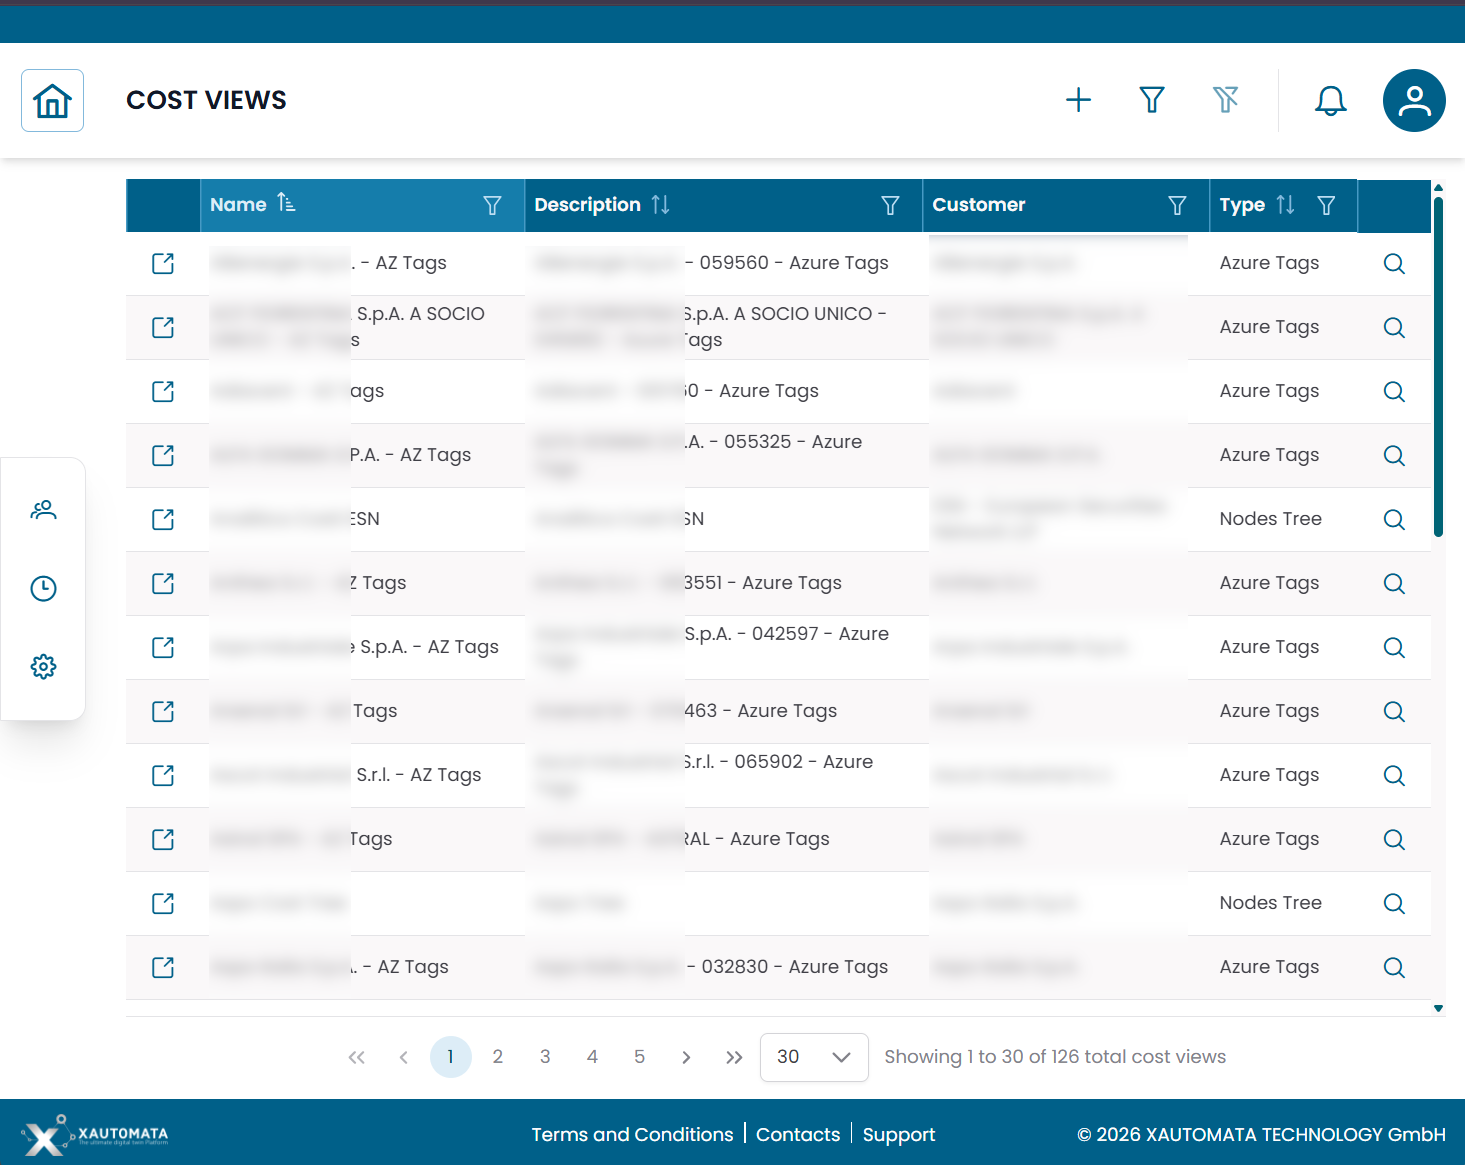
Fig.1 - Cost Views table
Cost View types
XAUTOMATA supports two types of Cost Views:
| Type | Status | Description |
|---|---|---|
| Nodes Tree | Available | A fully configurable tree structure built manually. Nodes group cloud resources via query-based filters. |
| Azure Tags | Coming soon | A view based on Azure resource tags. The configuration interface is currently under development. |
The rest of this page covers the Nodes Tree type, which is the currently available interface.
Nodes Tree — overview
A Nodes Tree Cost View is a visual hierarchy of cost nodes. Each node represents a grouping category in your accounting model (for example: an environment, a workload, a resource type).
Cloud billing resources are assigned to nodes through queries — filter rules that select which resources belong to each node. A node can have multiple queries, and each query can use either tags or resource identifiers as selection criteria.
Child nodes can further subdivide the resources of their parent node.
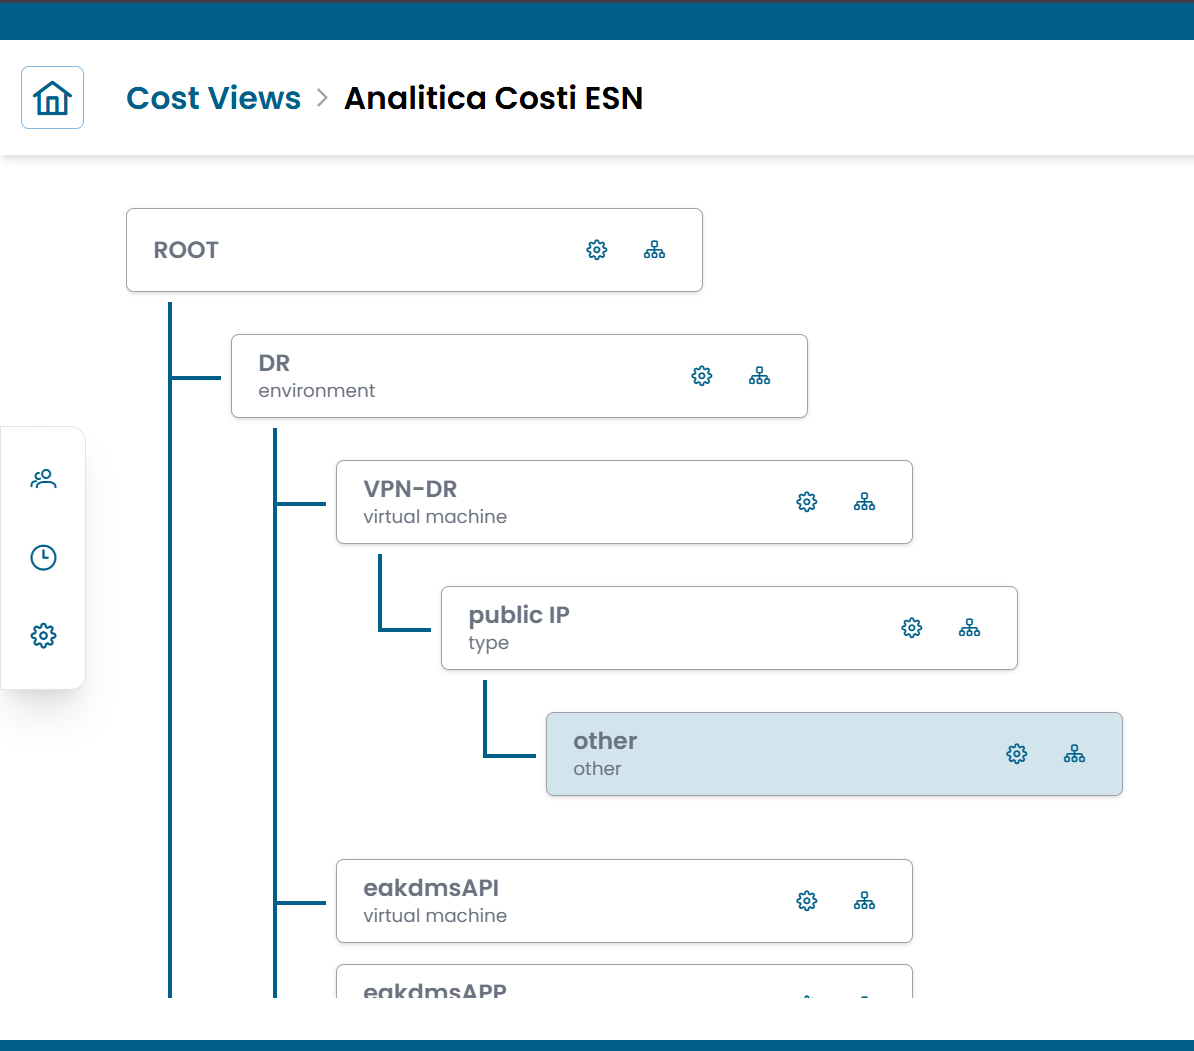
Fig.2 - Nodes Tree editor — ROOT with child nodes and nested levels
Opening a Cost View
Click the link icon (↗) on any row in the Cost Views table to open the tree editor for that Cost View.
The editor displays the full node hierarchy starting from the ROOT node. Each node shows:
- its name (bold) and a label underneath (for example: environment, virtual machine, type)
- a ⚙️ configure icon — opens the Node Configuration panel
- a 🌿 add child icon — adds a child node under this node
Configuring a node
Click the ⚙️ icon on any node to open the Node Configuration panel on the right.
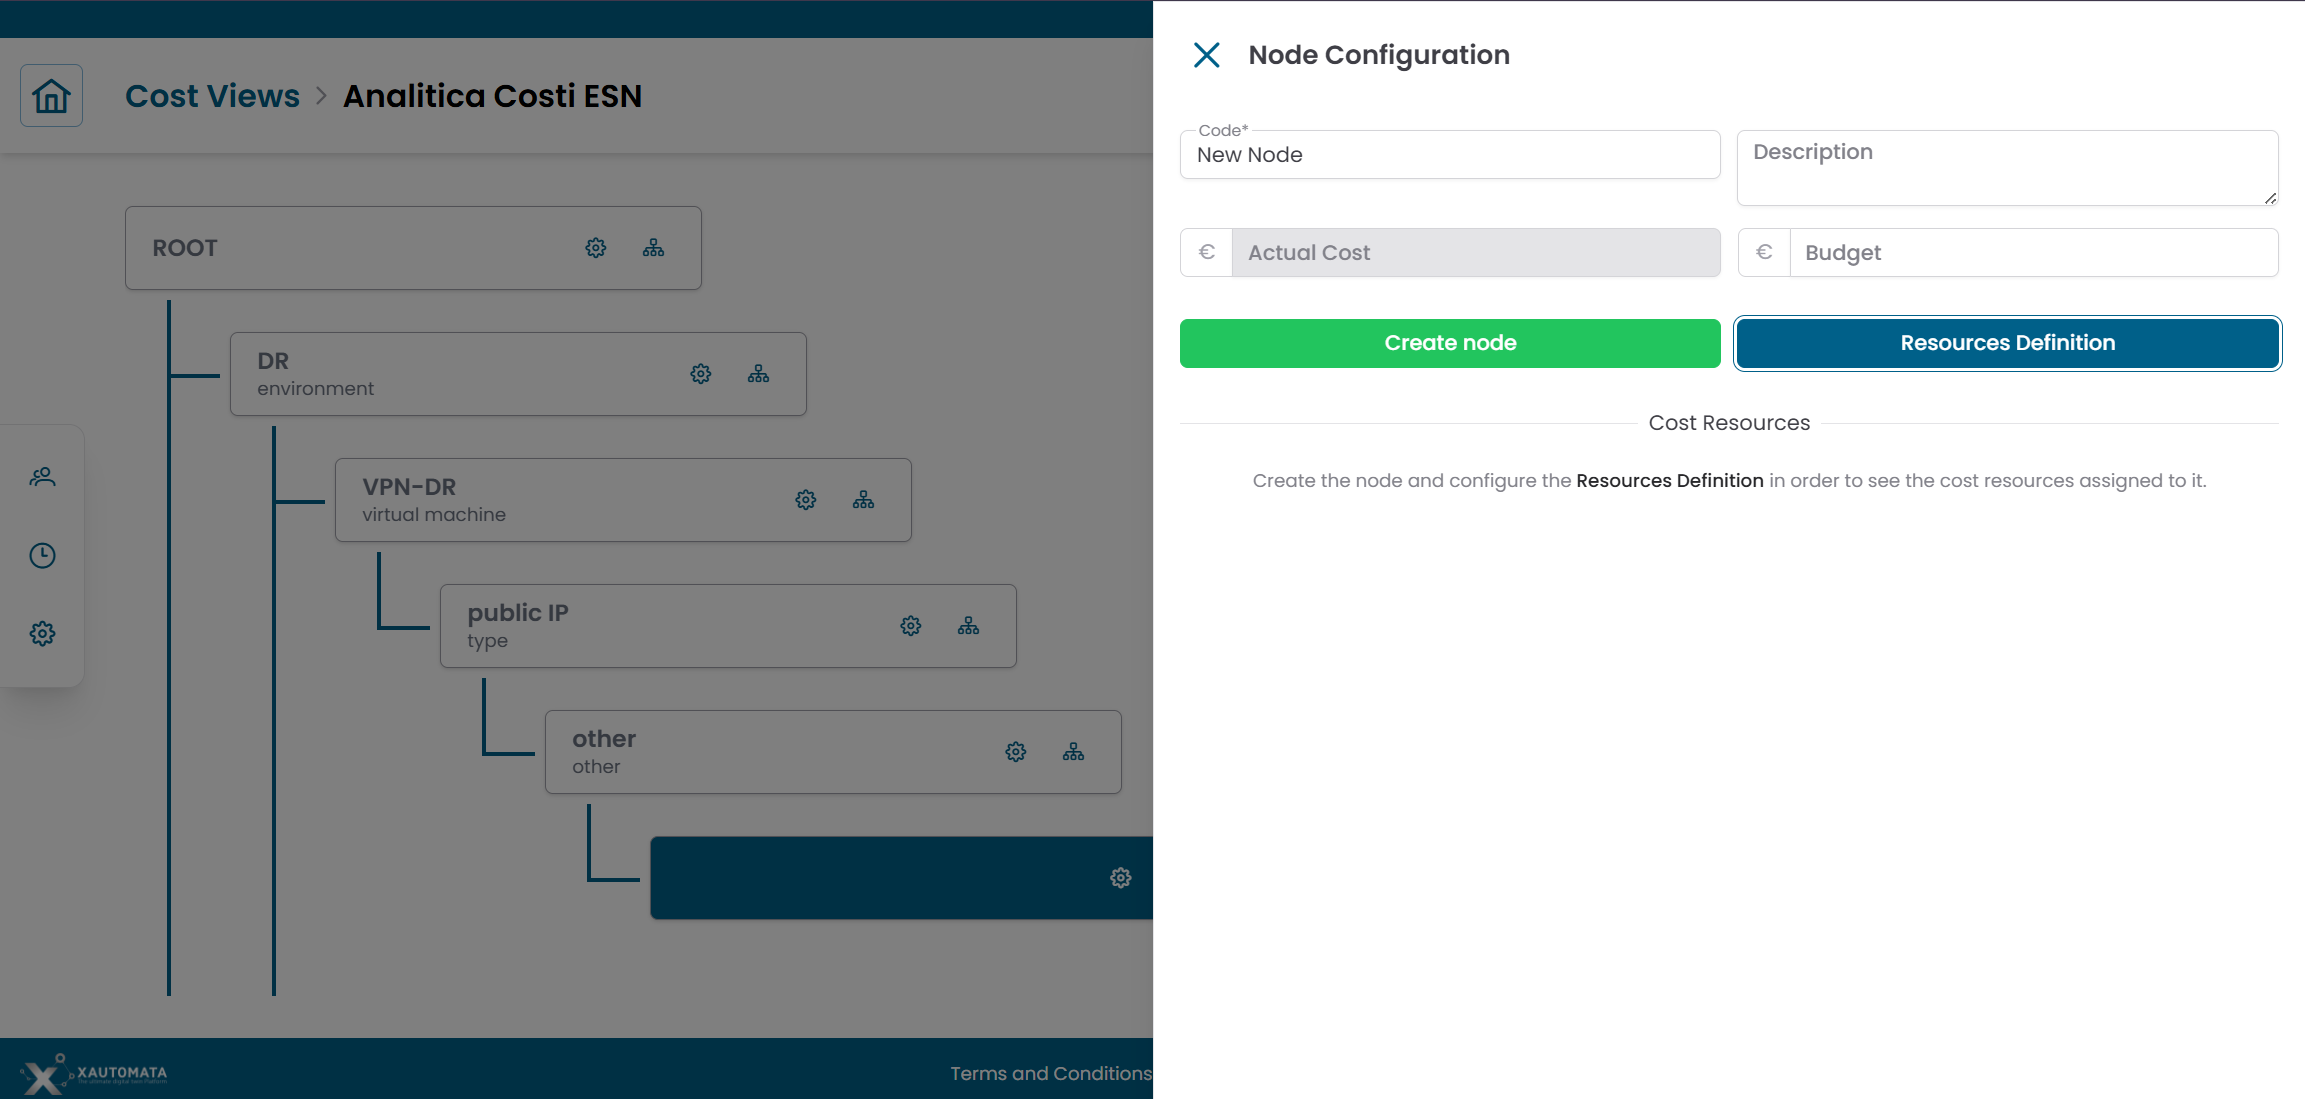
Fig.3 - Node Configuration panel with Cost Resources and Resources Definition button
| Field | Description |
|---|---|
| Code | Short identifier for the node |
| Description | Label shown under the node name in the tree |
| Actual Cost | Read-only — sum of costs from assigned resources |
| Budget | Optional budget target for this node |
The panel also shows a Cost Resources table listing the resources currently assigned to this node, with their individual costs. Click Show All Resources to see the full list.
Click RESOURCES DEFINITION to manage the query rules that determine which resources are assigned to this node.
Defining resources with queries
Clicking RESOURCES DEFINITION opens the Resource Query List — a list of queries that together define which billing resources belong to the node.
Click + ADD NEW QUERY to create a new query. This opens the Query Constructor.

Fig.4 - Resource Query List — add and manage queries for the node
Query Constructor
The Query Constructor offers two query modes:
| Mode | Description |
|---|---|
| Tags Query | Selects resources based on their cloud tags. Select a Tags View first, then define tag filters. |
| Resource Query | Selects resources by resource identifier — for explicit, manual selection. |
Note
Each query can only be of one type — Tags or Resource. To create a more complex resource selection, add multiple queries to the same node.

Fig.5 - Query Constructor — Tags Query and Resource Query modes
Once the query is defined, click ADD QUERY to save it and return to the Resource Query List. Click SAVE QUERIES when all queries for the node are complete.
Adding child nodes
Click the 🌿 icon on any node to add a child node under it.
Child nodes allow you to subdivide the resources of a parent node into more granular groupings. A child node can define its own queries to filter among the resources of its parent.
Warning
The exact scoping rules for child node resources are pending verification.
Relationship with Analytical Accounting widgets
Cost Views feed the Analytical Accounting widgets in dashboards:
- Cost Nodes Tree — displays the full node hierarchy with actual and budget costs per node
- Cost Resources by Tag — displays resources filtered by tag combinations
When configuring an Analytical Accounting widget, you select which Cost View it should reference. The widget then displays costs according to that view's structure.
Note
The Azure Tags Cost View type is currently under development. Views of this type appear in the table but their configuration interface shows Coming soon.
Tags are imported automatically from the cloud provider during billing data ingestion — XAUTOMATA downloads them directly from the provider API. No manual configuration is required on the XAUTOMATA side to make them available. The tags you see reflect the tagging conventions used in your cloud environment at the provider level.